


Okay, so I wanted to add a cool, hand-drawn baseball field to my latest project. I’m no artist, but I figured, how hard could it be? Turns out, it’s a little trickier than I thought, but totally doable. Here’s how I went about it:
First Steps: Gathering My Stuff
First, I grabbed a piece of paper and a pencil. I considered using a ruler, but decided to keep it loose and more, well, hand-drawn. It is call hand-draw, right? So i keep it that way.
Drawing the Diamond
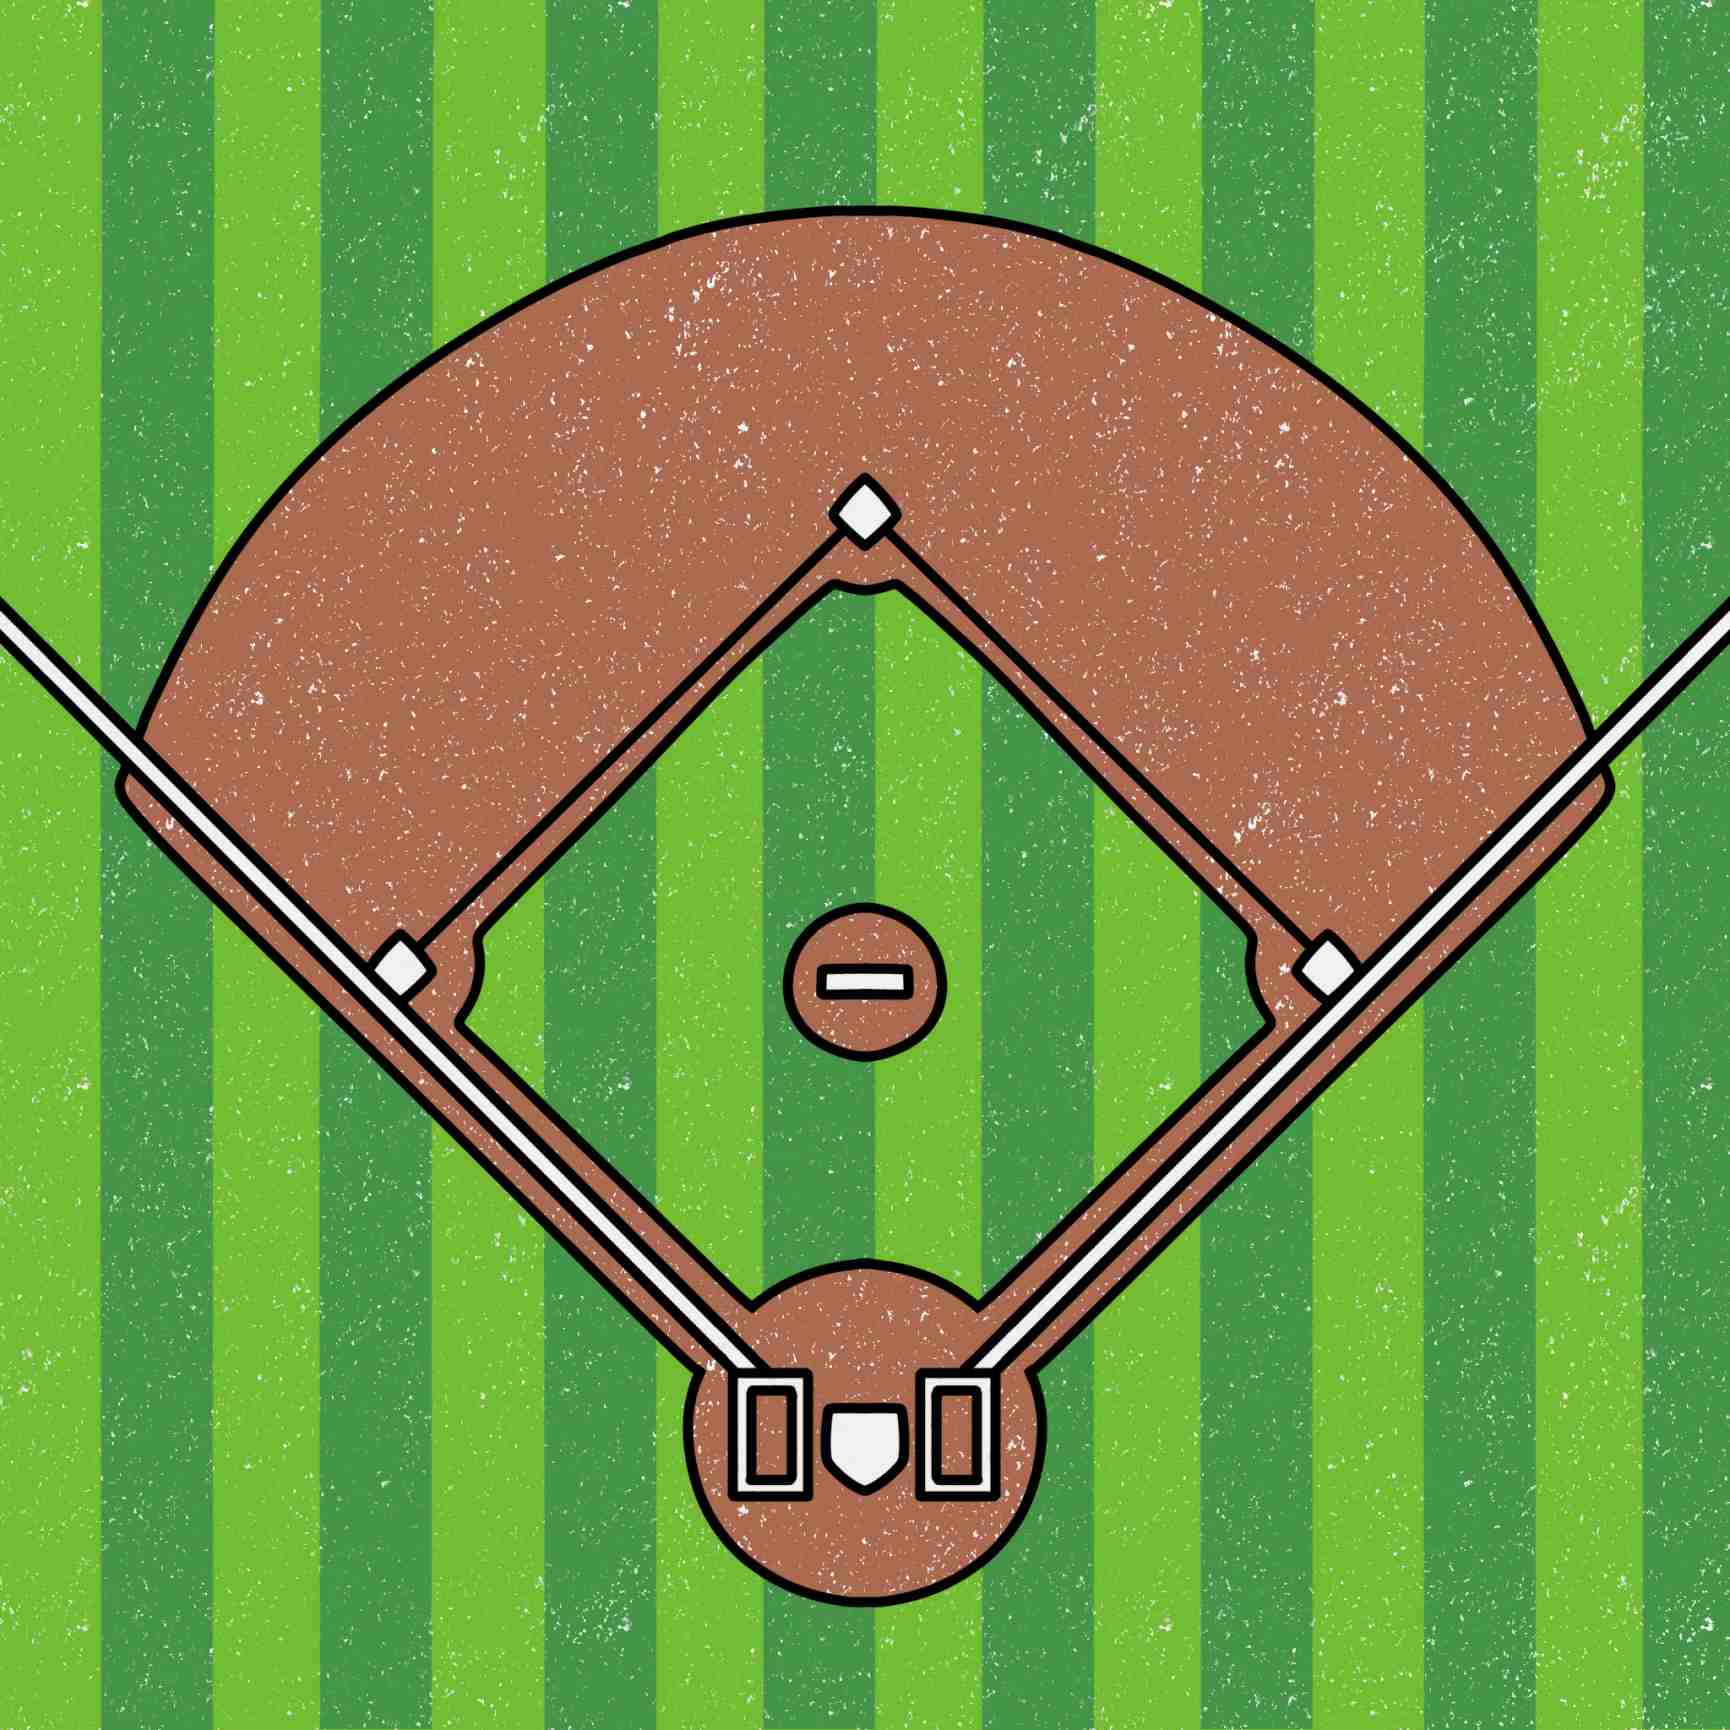
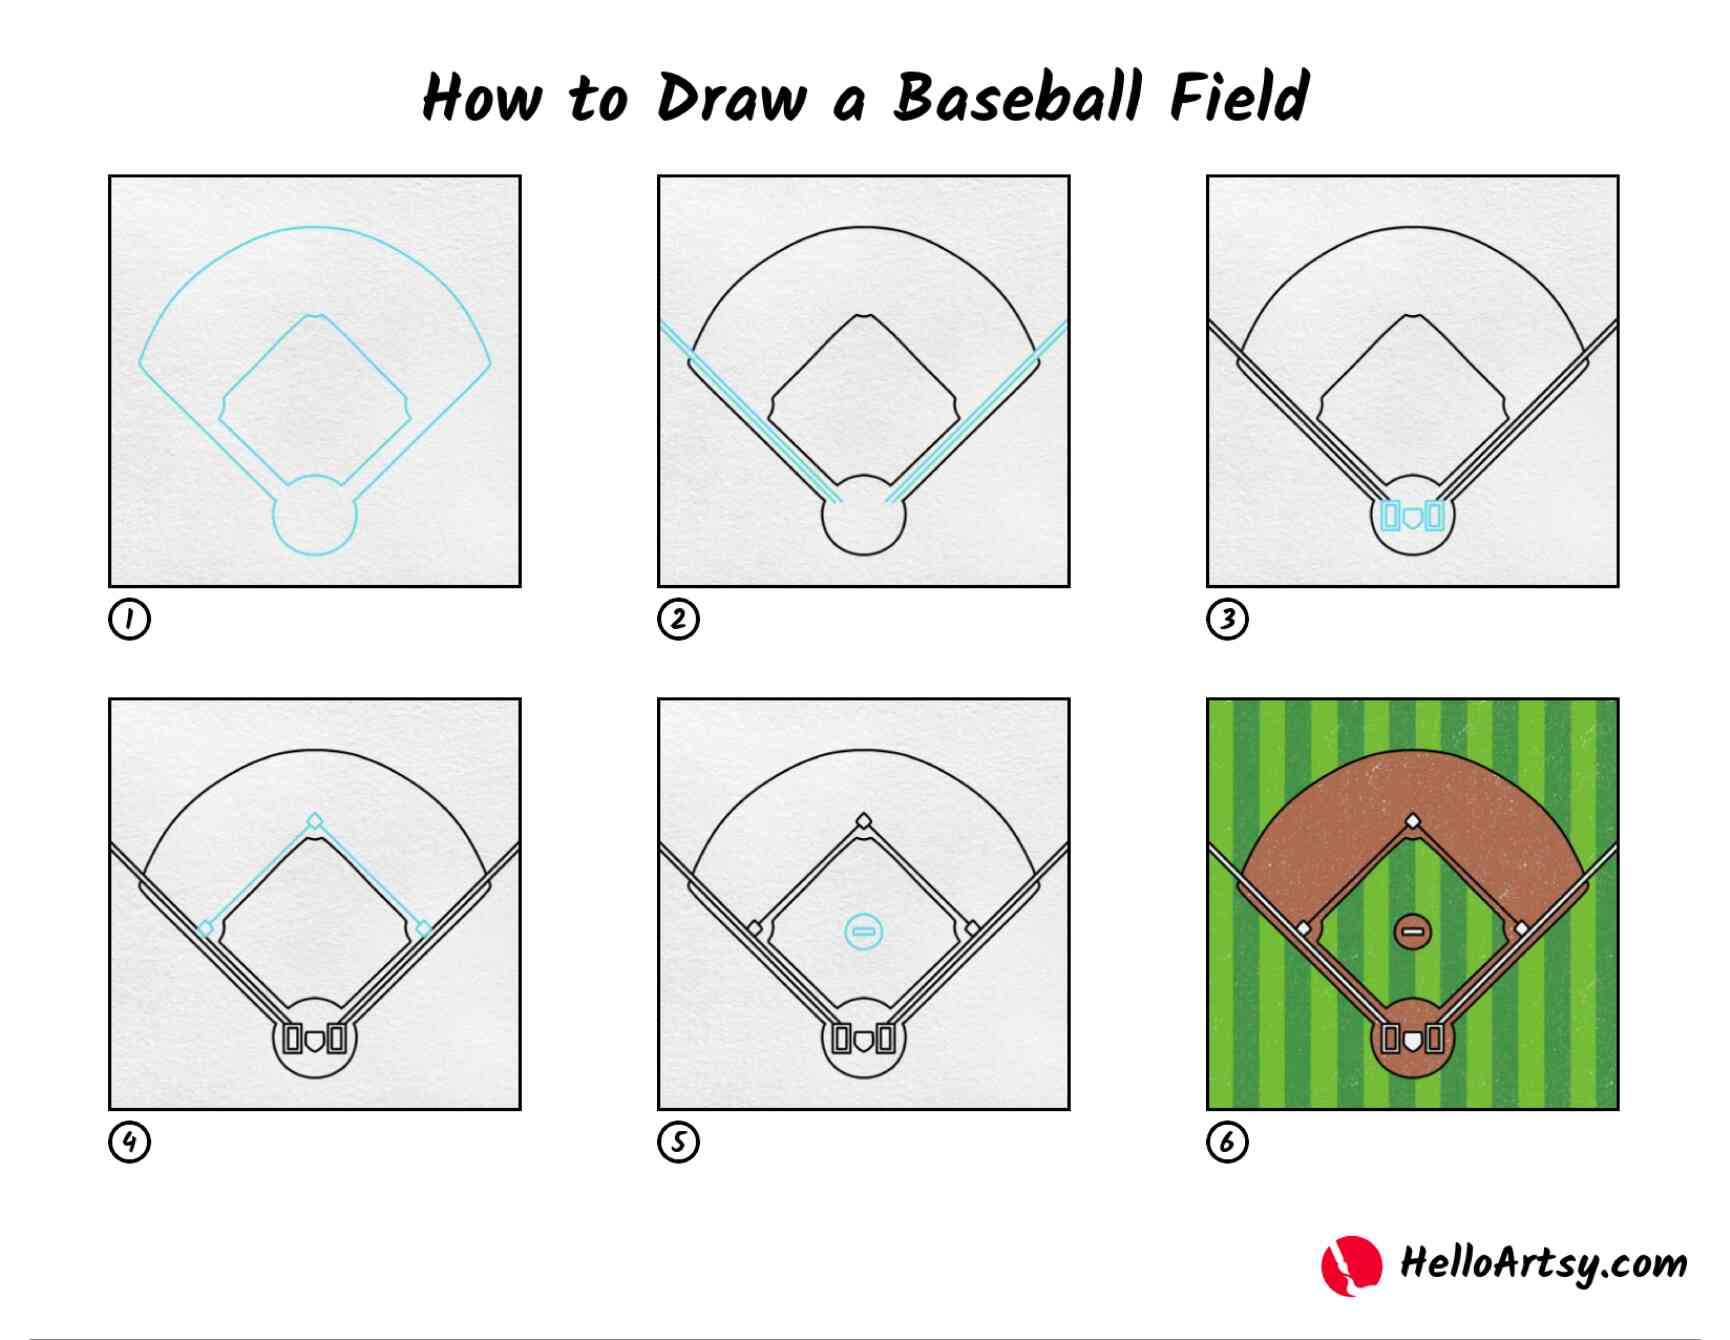
I started by sketching a big diamond shape. This was going to be my infield. I made sure it wasn’t perfectly symmetrical – a little wonkiness adds character, right? Then I added the bases, just little squares at each corner of the diamond. Then, a slightly bigger square for home plate.
Adding the Infield Details
Next, I drew a pitcher’s mound – basically a small circle in the center of the diamond. I connected it to home plate with a little rectangular strip, the pitching rubber. Then, I lightly sketched out the curved lines for the infield grass, separating it from the outfield.
Outfield and Foul Lines
Now for the outfield. I extended lines out from first and third base, making them flare outwards. These were my foul lines. Then, I drew a big, curved line connecting those foul lines, marking the outer edge of the outfield.
Finishing Touches(But No fancy details)
I went back and darkened some of the lines I wanted to stand out more. I used no fancy stuff this time.
I’m not perfect, but I did it!
And that’s it! My very own, slightly imperfect, hand-drawn baseball field. It’s not going to win any art awards, but it gets the job done and adds a nice, personal touch to my project. I might try adding some color next time, but for now, I’m pretty happy with my simple, sketched field.


